

Need more space on your iPhone so you can shoot high-res art photos without worrying about running out of storage? Smart move, those detailed shots eat up a lot of space fast. But how do you free up space without deleting everything in sight or stressing over every single MB? The good news is, it’s easier than you think. Whether you’ve been into art photography for a while or you’re a newborn artist, this guide will help you get the most out of your iPhone’s storage to keep capturing your best work without limits.
How Much Space Should I Free Up on My iPhone for High-Resolution Art Photos?
Actually, it’s tough to give a one-size-fits-all answer because it really depends on how you plan to use your iPhone. For instance, think about how frequently and how many photos you usually take. Do you prefer shooting just a few carefully composed shots, or do you capture multiple series from various angles?
Also, consider if you’ll be editing your photos directly on your iPhone. If so, you’ll need extra space so your editing apps don’t slow down or lag. On the other hand, maybe you plan to transfer your photos regularly to a laptop or another device for editing, storage, or selling. In that case, you might not need as much free space on your phone.
The more tasks you handle directly on your iPhone, taking, editing, and storing your high-res art photos, the more storage you’ll need to free up. So, take a minute to think about your workflow and plan your storage needs accordingly.
How to Free Up iPhone Storage for Art Photos
If you’re already reading this part, you’ve probably figured out roughly how much storage you’ll need to free up – great job! Now, let’s see how to do it. While you’ll find articles online about various methods for freeing up space on your iPhone, here we’ll stick to the quickest, most effective options – remove the media files and reduce other apps’ data. This way, if your phone suddenly runs out of storage mid-shoot, you’ll know exactly what to do and get back to capturing your art with as little downtime as possible.
Step 1: Clean Your Photos App
If you regularly take high-res photos, your Photos app probably consumes most of your storage. But aside from those important shots, your gallery is likely filled with other files that can be deleted. Instead of manually searching through each album, it’s easier to use an iPhone cleaner app.
There are many cleaners in the App Store, but not all of them perform as advertised. To save you the headache, we recommend using Clever Cleaner: AI CleanUp App. It’s a free app that helps tidy up your photo and video gallery without deleting important images. It finds exact duplicates and similar photos (perfect for when you shoot multiple angles), screenshots, large files (usually videos, but also potentially RAW-format images if you store your art photos that way), and even converts Live Photos into regular still images (useful if you captured emotional moments but prefer to remove the motion).

How to use Clever Cleaner to remove duplicates and similar photos:
- Download Clever Cleaner for iPhone from the App Store or the official website.
- Open the app and grant it access to your photo library. Allow the app to complete the initial scan, after which it will automatically open the necessary function to manage duplicates or similar photos.
- To remove all duplicates and similar photos at once, tap the ‘Smart Cleanup’ button. This action will delete all duplicates, retaining only the best photo from each group as automatically selected by the app.
- If you prefer to selectively remove duplicates, tap on any grouped photos, select the images you wish to delete, and choose ‘Move to Trash.’ Repeat this process for each group.

- The selected photos will move to the app’s trash bin. Review these and, if necessary, restore any pictures before final deletion. To delete them, slide the ‘Slide to Delete’ control.
- All marked copies will then move to the ‘Recently Deleted’ album. The app will provide instructions on how to clean this album. Review and follow these instructions.

The steps for the other features in the app work pretty much the same way, so you shouldn’t have any trouble using them. If you want to clear as much space as possible, go ahead and use each of these tools. You could free up tens of gigabytes with just a few taps.
Step 2: Remove Other Media from Your iPhone
While the Photos app typically holds most of your media, the Files app shouldn’t be overlooked. You might find files you downloaded from the internet or transferred from other sources, especially if you set your device to save downloads there. This could include not just photos and videos, but also other file types, like presentations or documents where you’ve kept details about your art photos.
Here are steps to manage media in the Files app:
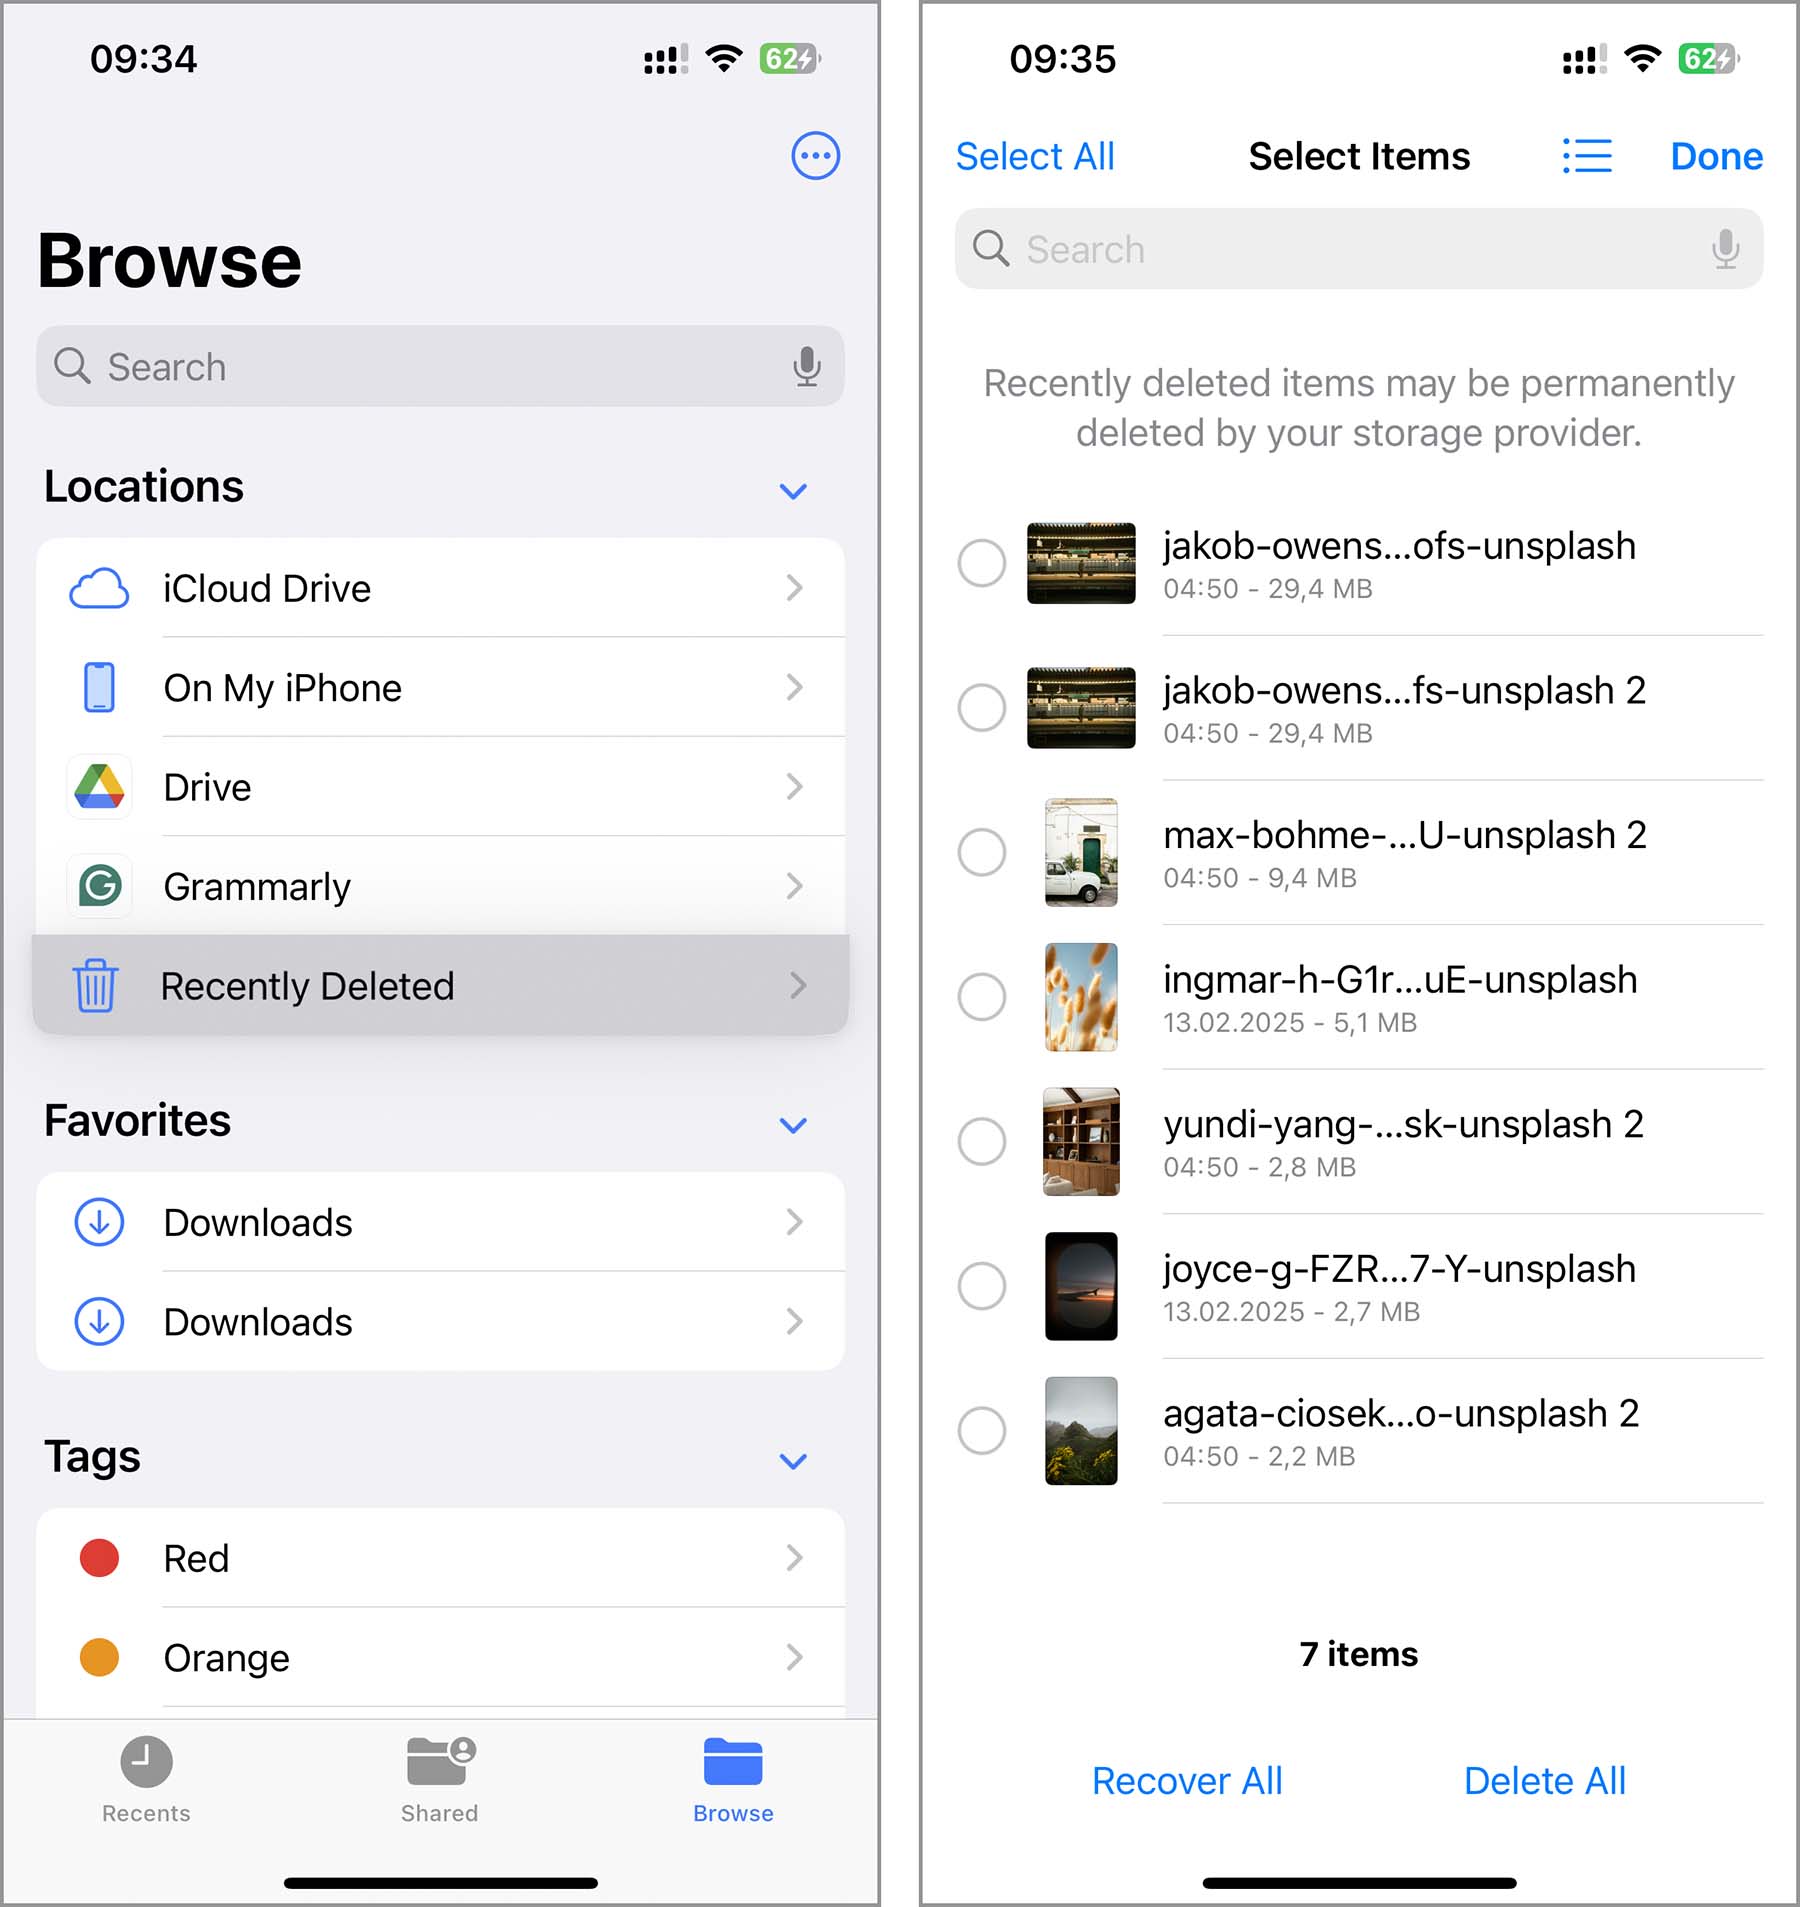
- Locate the Files app on your iPhone and open it to view all the stored documents and media.
- Tap “Browse” at the bottom, then choose “On My iPhone” or “iCloud Drive” to see what’s stored there. Use the sorting feature to organize by size, making it easier to spot the biggest files.

- Look through the files, especially large items that you no longer need. These might include old presentations, large PDFs, or archived documents that are no longer relevant.
- To delete, swipe left on a file and tap the red “Delete” button. For multiple files, tap “Select” (top-right), pick the ones you want to get rid, and hit the trash icon.
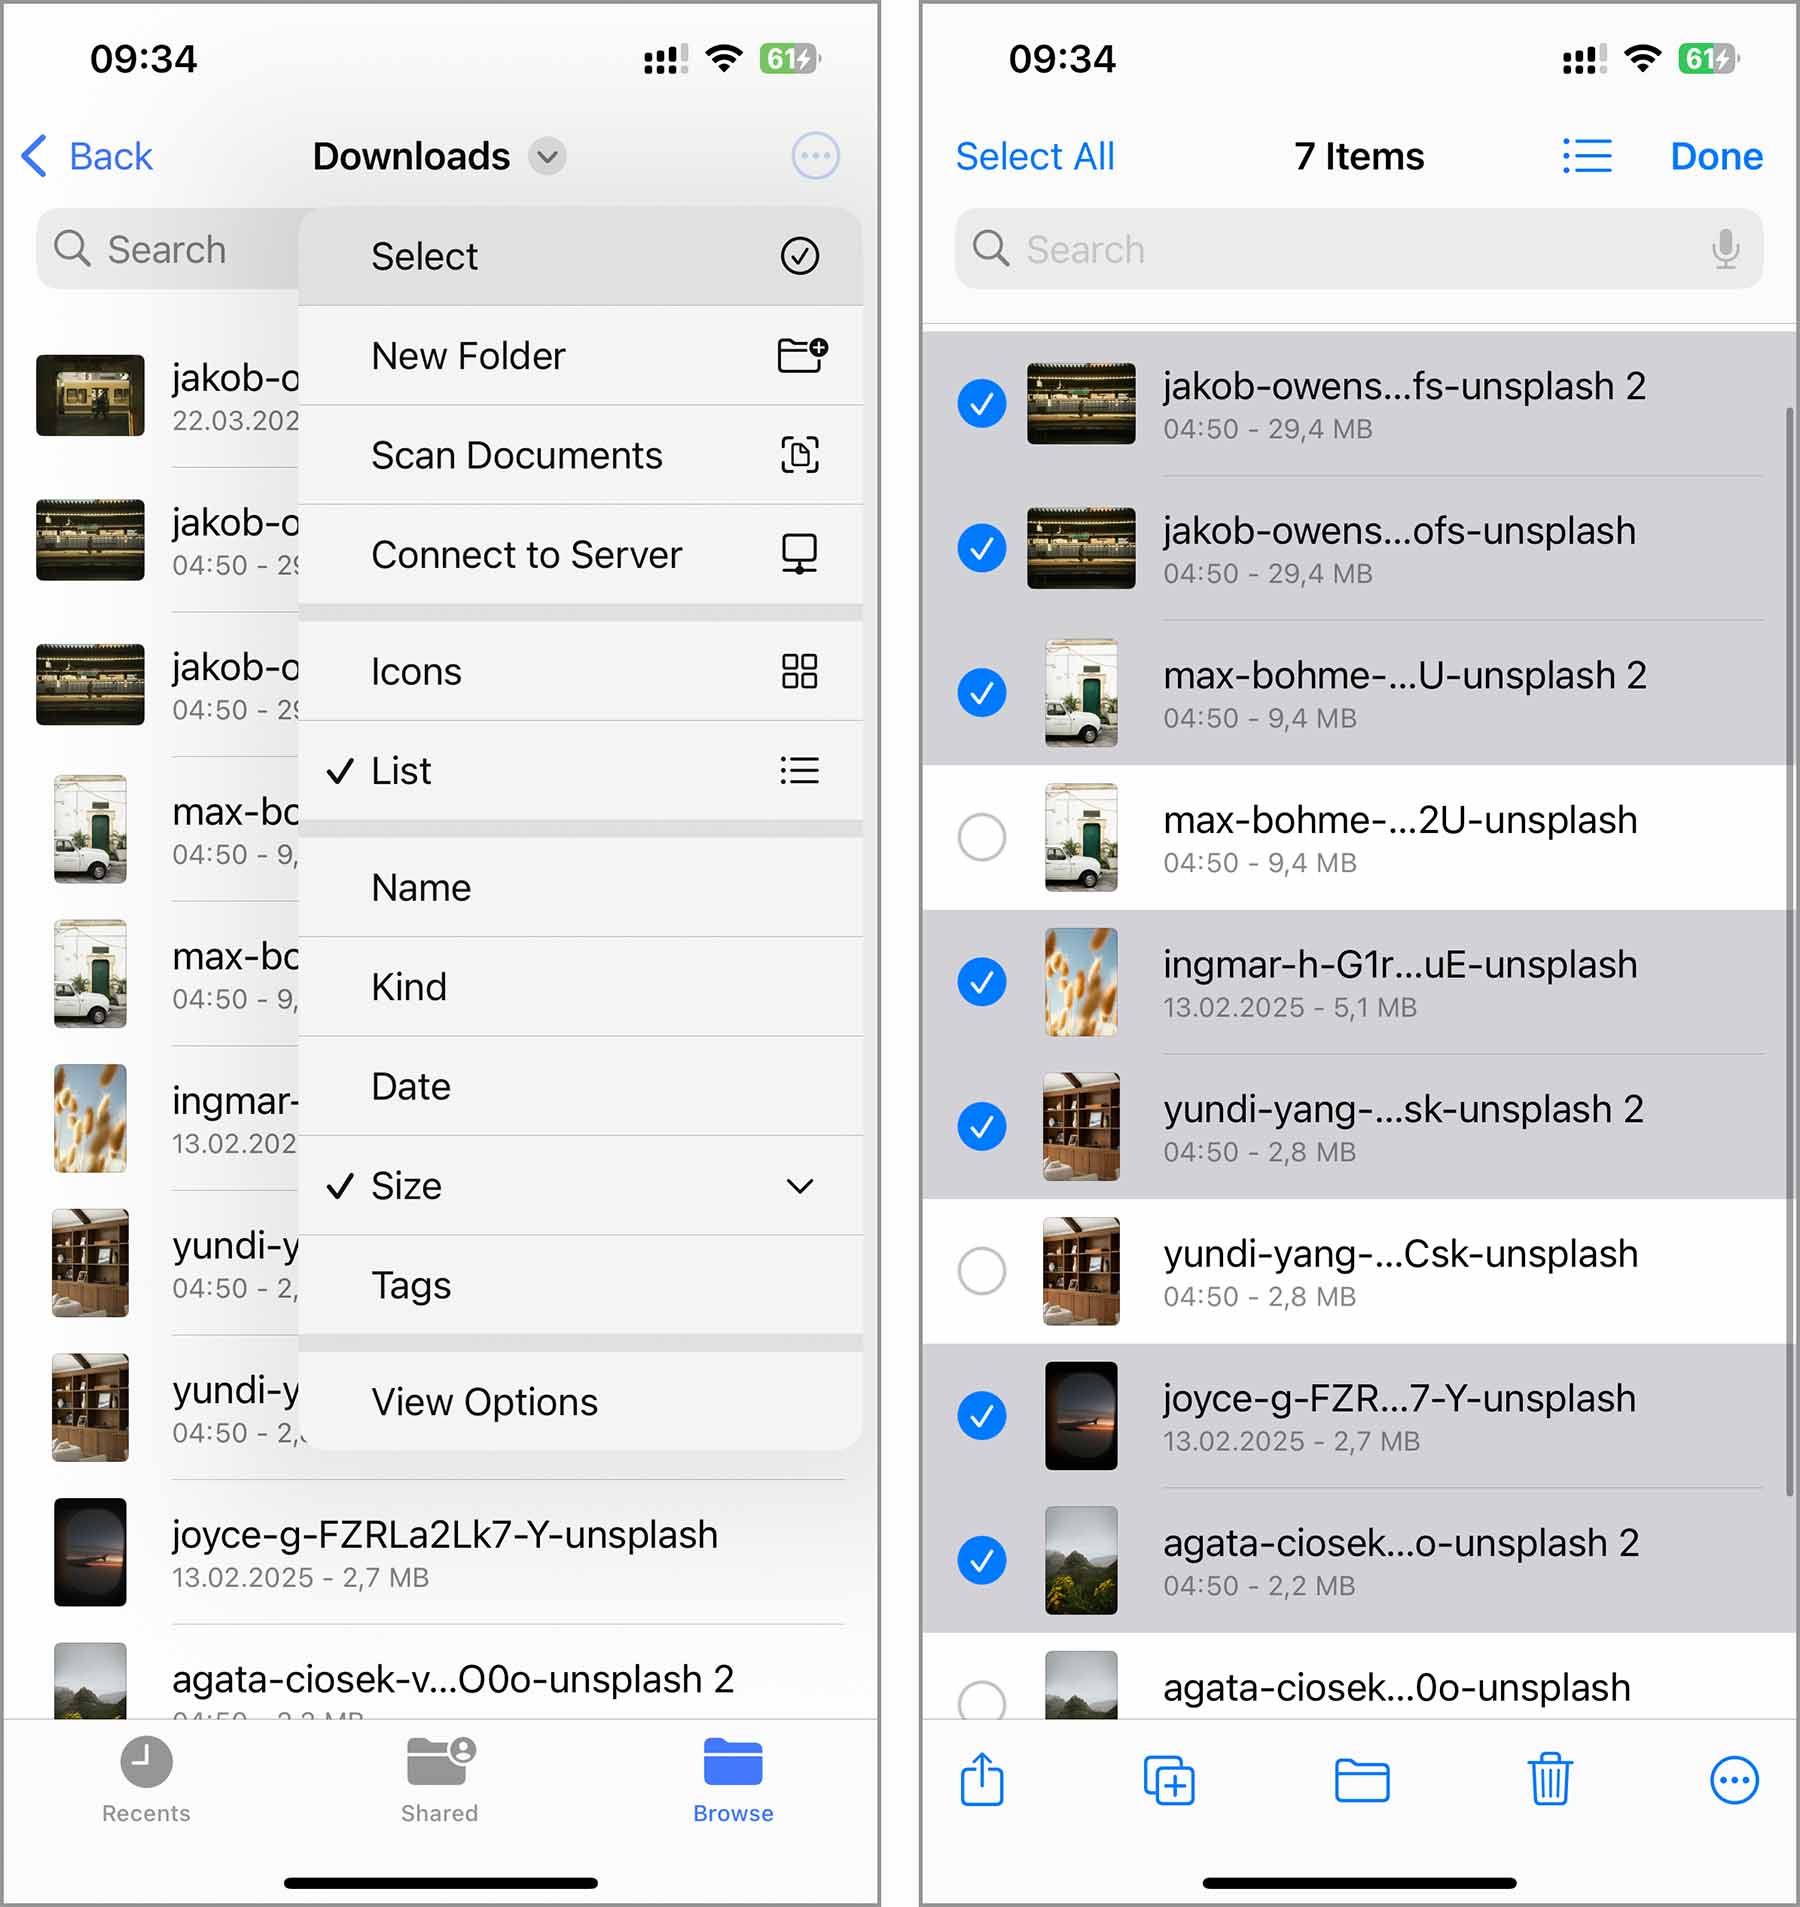
- After deletion, files move to the ‘Recently Deleted’ folder. Navigate to this folder and select “Delete All” or individually delete items to free up space right away.
Step 3: Clean Up Your App Data
Apps and their related data can also eat up a big chunk of your iPhone’s storage. Over time, they accumulate temporary files and caches to speed up performance, but these files take up space. Although some applications offer built-in options to clear this data (notable examples include Facebook, TikTok, and Telegram), such features are rare. If an app doesn’t have this feature, the best way to reclaim space is to reinstall it (or delete it entirely if you no longer need it).
Rather than removing apps straight from the Home Screen, we suggest doing it through Settings. This lets you see exactly how much storage each app is using:
- Tap on the “Settings” icon on your iPhone. Scroll to and select “General” from the settings menu.
- Tap on iPhone Storage. This option provides a detailed breakdown of all the apps installed on your iPhone and the amount of storage each consumes.

- Scroll through the list to spot which apps are taking up the most storage, then tap an app for more details.
- Tap Delete App to remove the app and all its data. If you still need it, reinstall from the App Store to start with a clean slate.

If you’d rather not delete any media or apps but still need extra space on your iPhone for high-res art photos, iCloud sync might be your best bet. It moves your full-resolution photos to iCloud and keeps lightweight thumbnails on your phone to save space. Just keep in mind – this isn’t totally free. iCloud only gives you 5 GB of free storage, which usually isn’t enough if you’ve got a growing portfolio.
And that’s it, you’ve now got a solid set of tools and tips to keep shooting without interruptions, while continuing to grow your art style, creativity, and career.